

Halloween is a magical time of year filled with trick or treating, spooky costumes, and endless opportunities for creative family fun. When it comes to crafting with children during the festive season, simple materials often yield the most memorable results. Among all the art supplies sitting in your pantry or craft closet, the humble paper plate stands out as one of the most versatile and accessible items available. Cheap, sturdy, and easy to manipulate, paper plates serve as the perfect blank canvas for young artists to bring their favorite Halloween monsters, ghosts, and mythical creatures to life.
Creating handmade Halloween decorations using paper plates is an excellent way to engage children of all ages. Crafting helps kids develop crucial fine motor skills, improves hand eye coordination, and encourages imaginative expression without requiring expensive art equipment.
Whether you are a parent looking for a cozy rainy day activity, a teacher planning classroom seasonal art projects, or a party host seeking interactive entertainments for a room full of energetic toddlers, paper plate crafts offer a stress free solution. With just a few basic additions like washable paint, colorful construction paper, glue, and googly eyes, an ordinary plate transforms into a flying witch, a spooky spider web, or a glowing jack o lantern in just a few simple steps. Easy DIY Halloween Crafts which are spooky and magical
This collection of paper plate Halloween crafts is designed to inspire makers of all skill levels.
Every project relies on straightforward techniques like handprint stamping, simple paper cutting, and easy assembly that little hands can master with minimal supervision. From friendly flying ghosts to bright green monsters and bubbly witch cauldrons, these ten projects will bring warmth, color, and a touch of handmade charm to your home or classroom this autumn season. Let us dive in and explore how you can create these charmingly spooky keepsakes together.
Spooky, Simple & Easy DIY Halloween Paper Plate Crafts for Kids
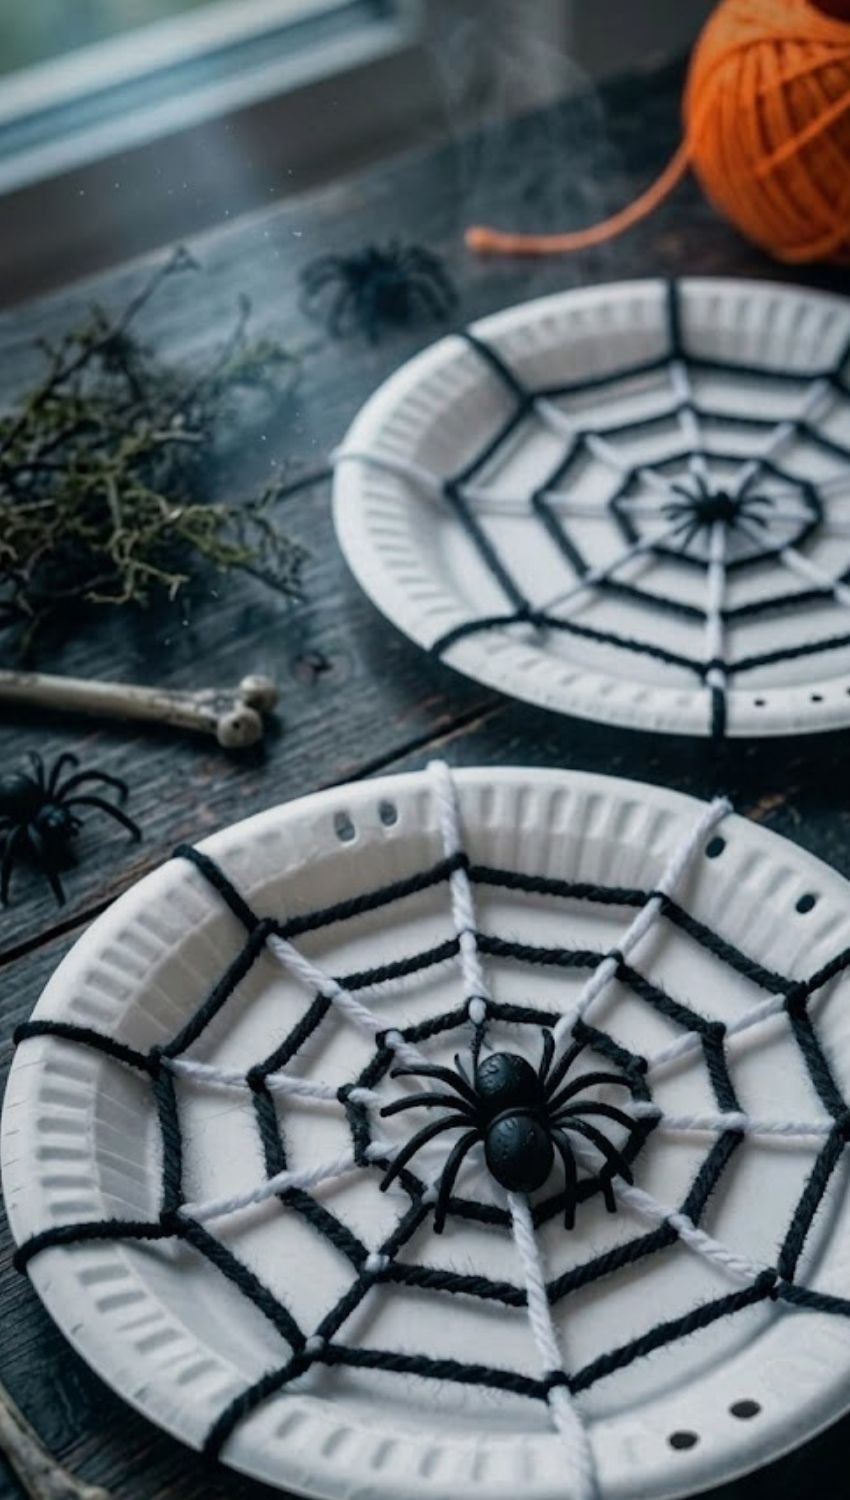
Paper Plate Spider Web craft for Halloween
Materials Needed
- Plain white paper plates
- Black and white yarn
- Hole punch (or a large needle/pencil tip to poke holes)
- Small plastic spiders
- Scissors (for preparation)
- Glue or clear tape
Step-by-Step Instructions
- Prepare the Plate EdgesPunch an even number of small holes (around 8 to 12) evenly spaced along the outer rim of the paper plate.
- Create the Base Web FrameCut a piece of white yarn. Thread it through opposite holes across the plate to create intersecting lines, forming a starburst or crosshatch pattern in the center. Knot the ends securely on the back of the plate.
- Weave the Inner Web PatternTie a piece of black yarn onto one of the center spoke threads. Weave in a spiral pattern outward, going over and under each spoke line to form the web rings. Tie off the end on the back.
- Add Contrast LayersRepeat the weaving process using alternating sections of black and white yarn to give the web extra depth and texture.
- Attach the SpidersGlue a plastic spider into the center of the web, or hook its legs through the yarn strands so it sits securely in place. Scatter extra spiders around for display.
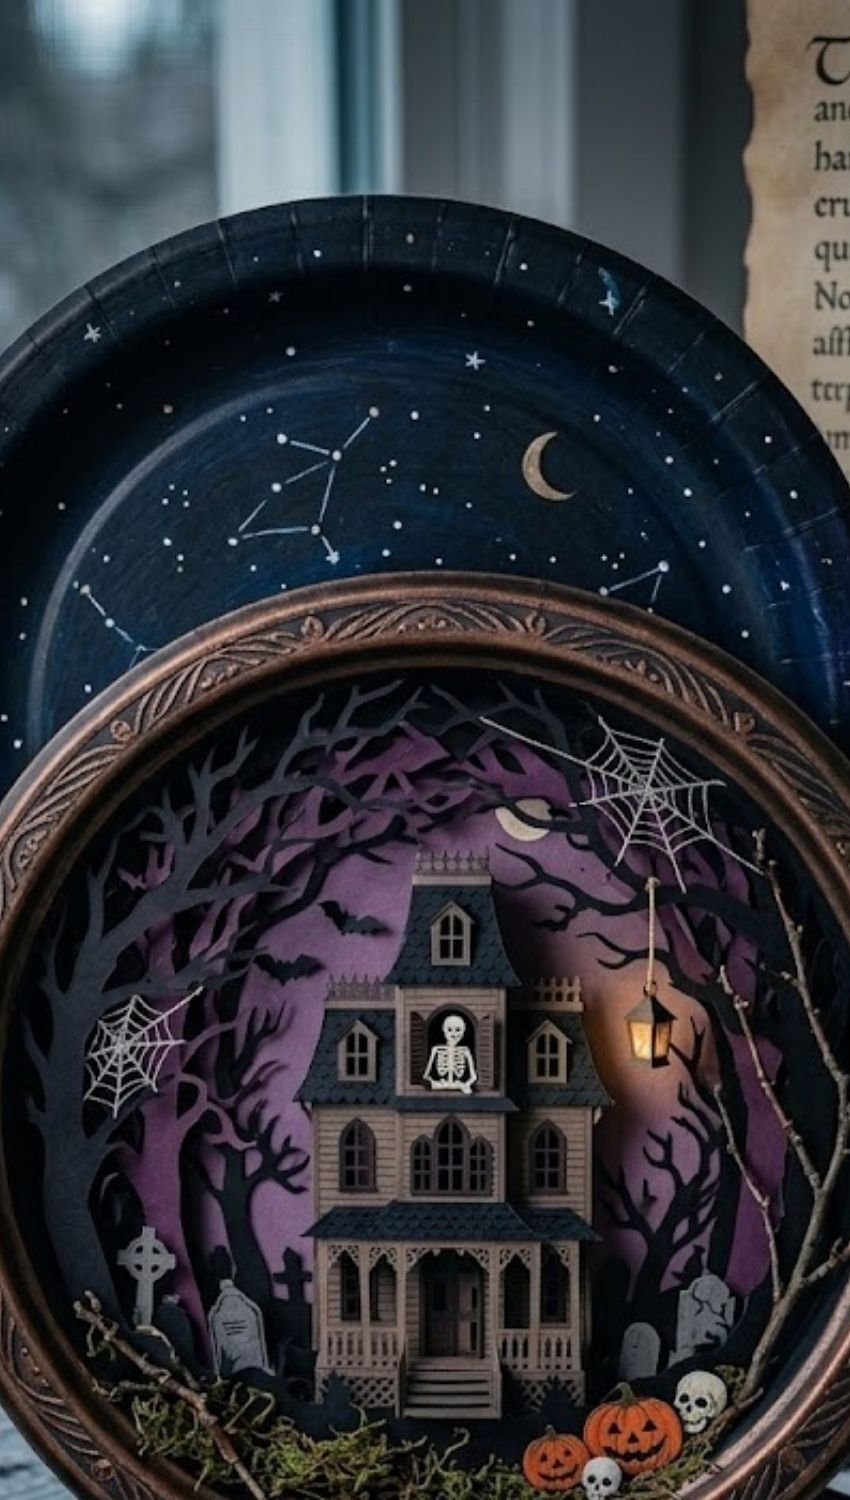
3D Layered Paper Plate Haunted House Diorama craft for Halloween
Materials Needed
- Heavy-duty paper plates (or small paper pie tins)
- Heavy cardstock (black, deep purple, and dark grey)
- Acrylic paints (black, metallic bronze/copper, dark blue, white)
- Precision craft knife (X-Acto knife) and self-healing cutting mat
- Foam adhesive dots/tape (for creating 3D depth)
- Craft glue or hot glue gun
- Fine-tip metallic paint pens (gold/silver) or white gel pen
- Small embellishments: dried moss, tiny twigs, miniature LED tea light
Step-by-Step Instructions
- Prepare and Paint the Base Frame
- Take two paper plates. On the first plate, cut out the inner circle leaving only the outer rim; paint this rim with black acrylic paint, then lightly dry-brush metallic bronze paint over top to create an antique carved frame texture.
- On the second plate (the base), paint the interior background with a gradient transition from deep purple at the bottom to midnight blue at the top. Use a fine white gel pen or metallic marker to draw subtle constellation lines and tiny stars.
- Precision-Cut the Scene Layers
- Using a precision craft knife and cardstock, cut out three distinct background layers:
- Back Layer: Silhouetted gnarled trees and tombstone outlines.
- Middle Layer: A detailed Victorian mansion with intricate window cutouts and roof filigree.
- Foreground Layer: Low tombstone clusters, bare branches, and small jack-o'-lantern shapes.
- Using a precision craft knife and cardstock, cut out three distinct background layers:
- Assemble the 3D Depth
- Attach the back layer onto the painted plate base using thin foam dots.
- Layer the middle mansion silhouette over the back layer using thicker double-stacked foam adhesive dots to create visible depth between the trees and the manor.
- Attach the foreground elements along the bottom lip of the plate.
- Add Miniature Details & Lighting
- Glue tiny bits of real dried moss and small natural twigs around the base of the mansion and tombstones for realistic texture.
- Place a miniature LED tea light or micro LED bulb behind the mansion window cutout so it glows from within.
- Seal and Frame
- Glue the metallic-painted outer rim plate directly over the top assembly to seal the edges and complete the shadowbox diorama look.
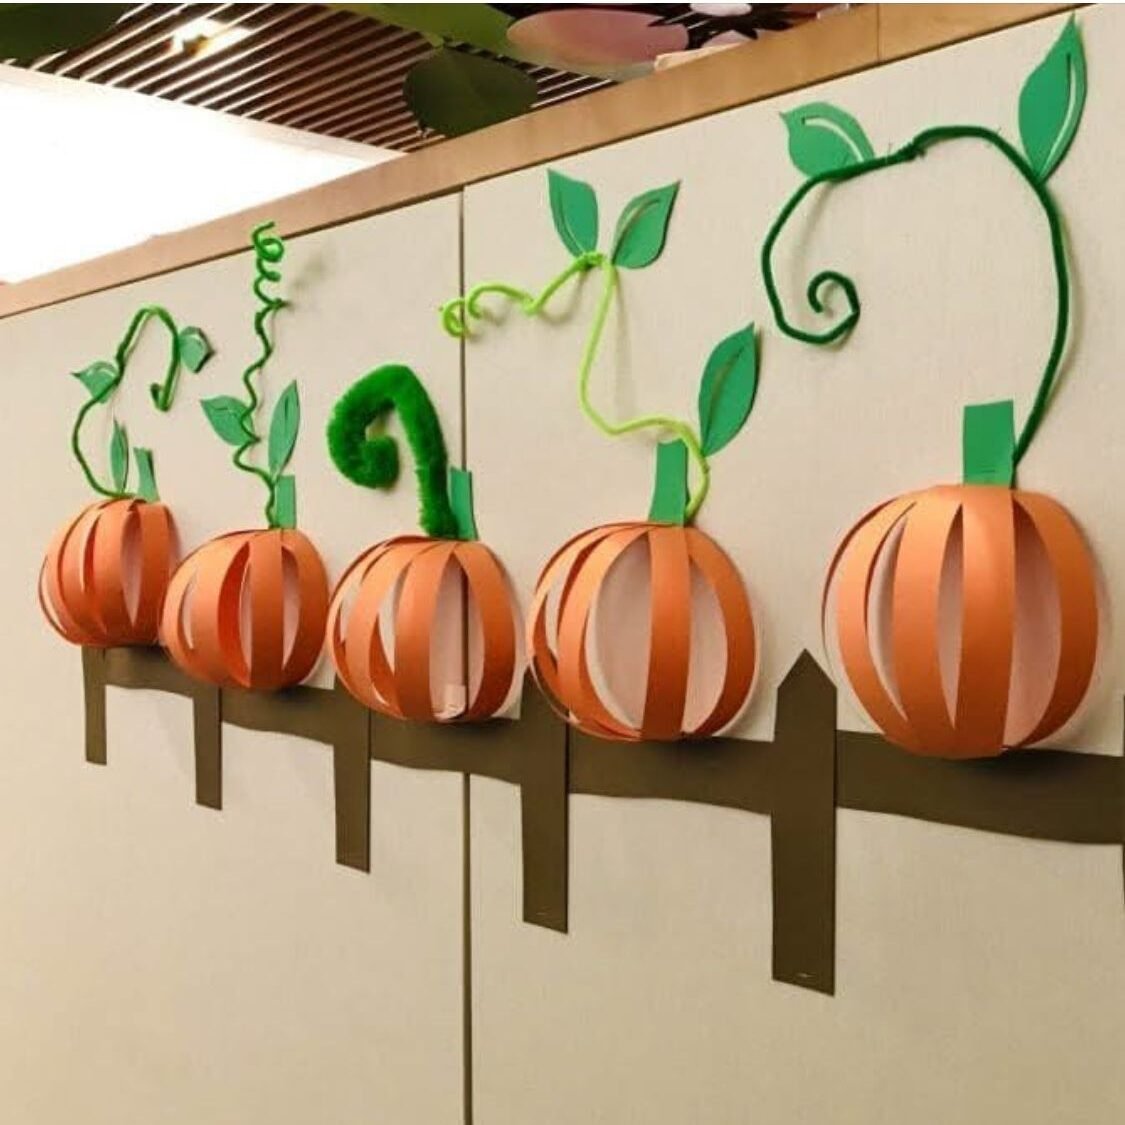
Halloween Paper Plate 3D Pumpkins
- Paint a paper plate orange on both sides and let it dry.
- Slice the plate into strips, keeping top and bottom ends connected to form a sphere.
- Add a green paper stem and pipe cleaner vines to the top rim.
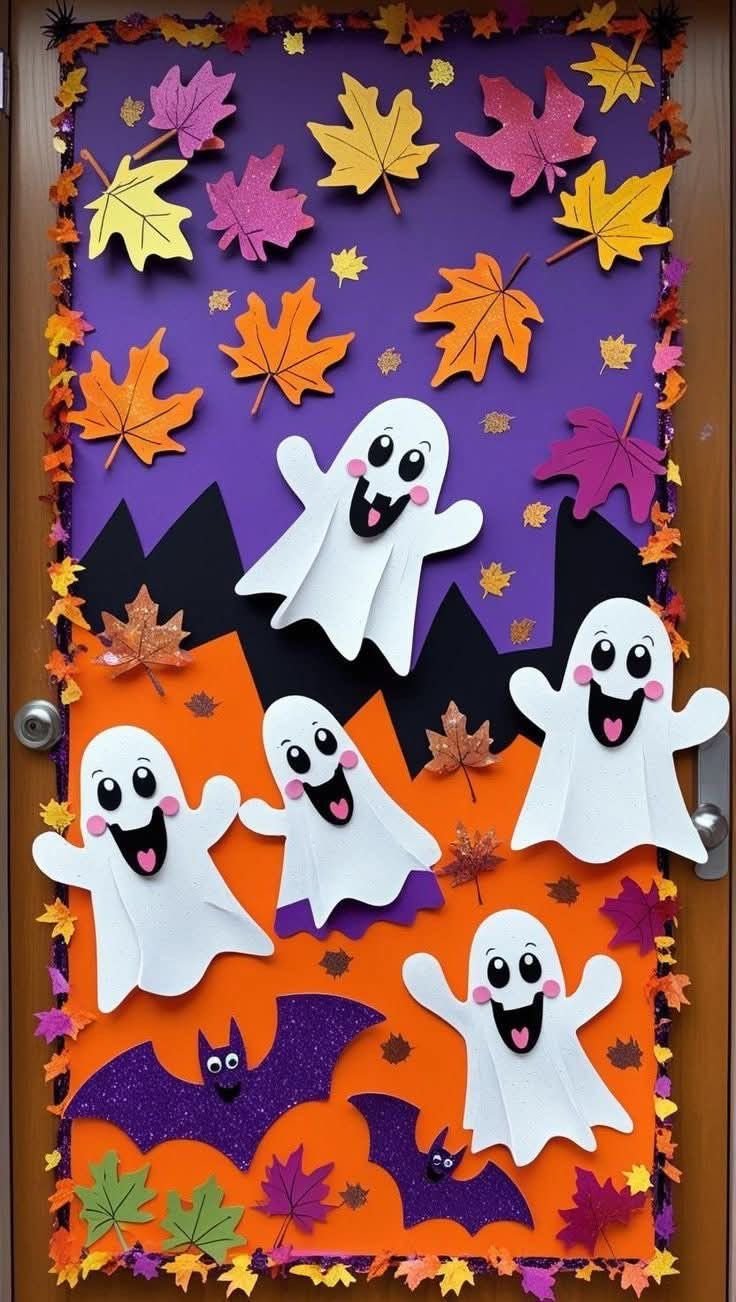
DIY Paper Ghosts and Fall Leaves Craft
- Trim paper plates into wavy, floating ghost silhouettes.
- Add black paper mouths, pink cheeks, and dark googly eyes for expressive faces.
- Glue the paper plate ghosts onto a backdrop featuring fall leaves and paper ba
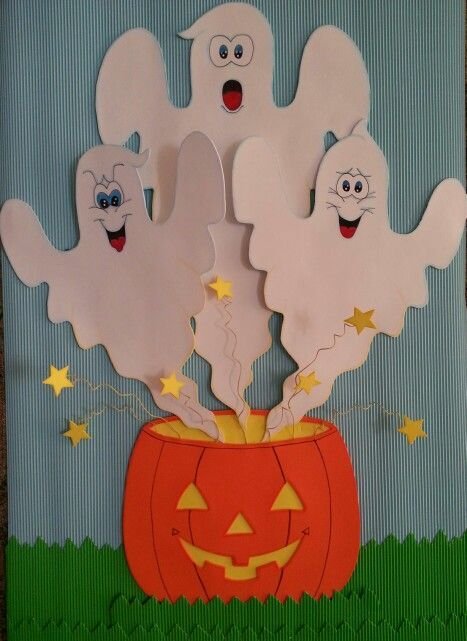
Paper Plate Ghost Pumpkin Cauldron
- Cut out white paper ghosts with expressive drawn faces.
- Paint a paper plate orange and shape it into a pumpkin cauldron base.
- Attach the ghosts emerging from the pumpkin cauldron using yellow stars on wire.
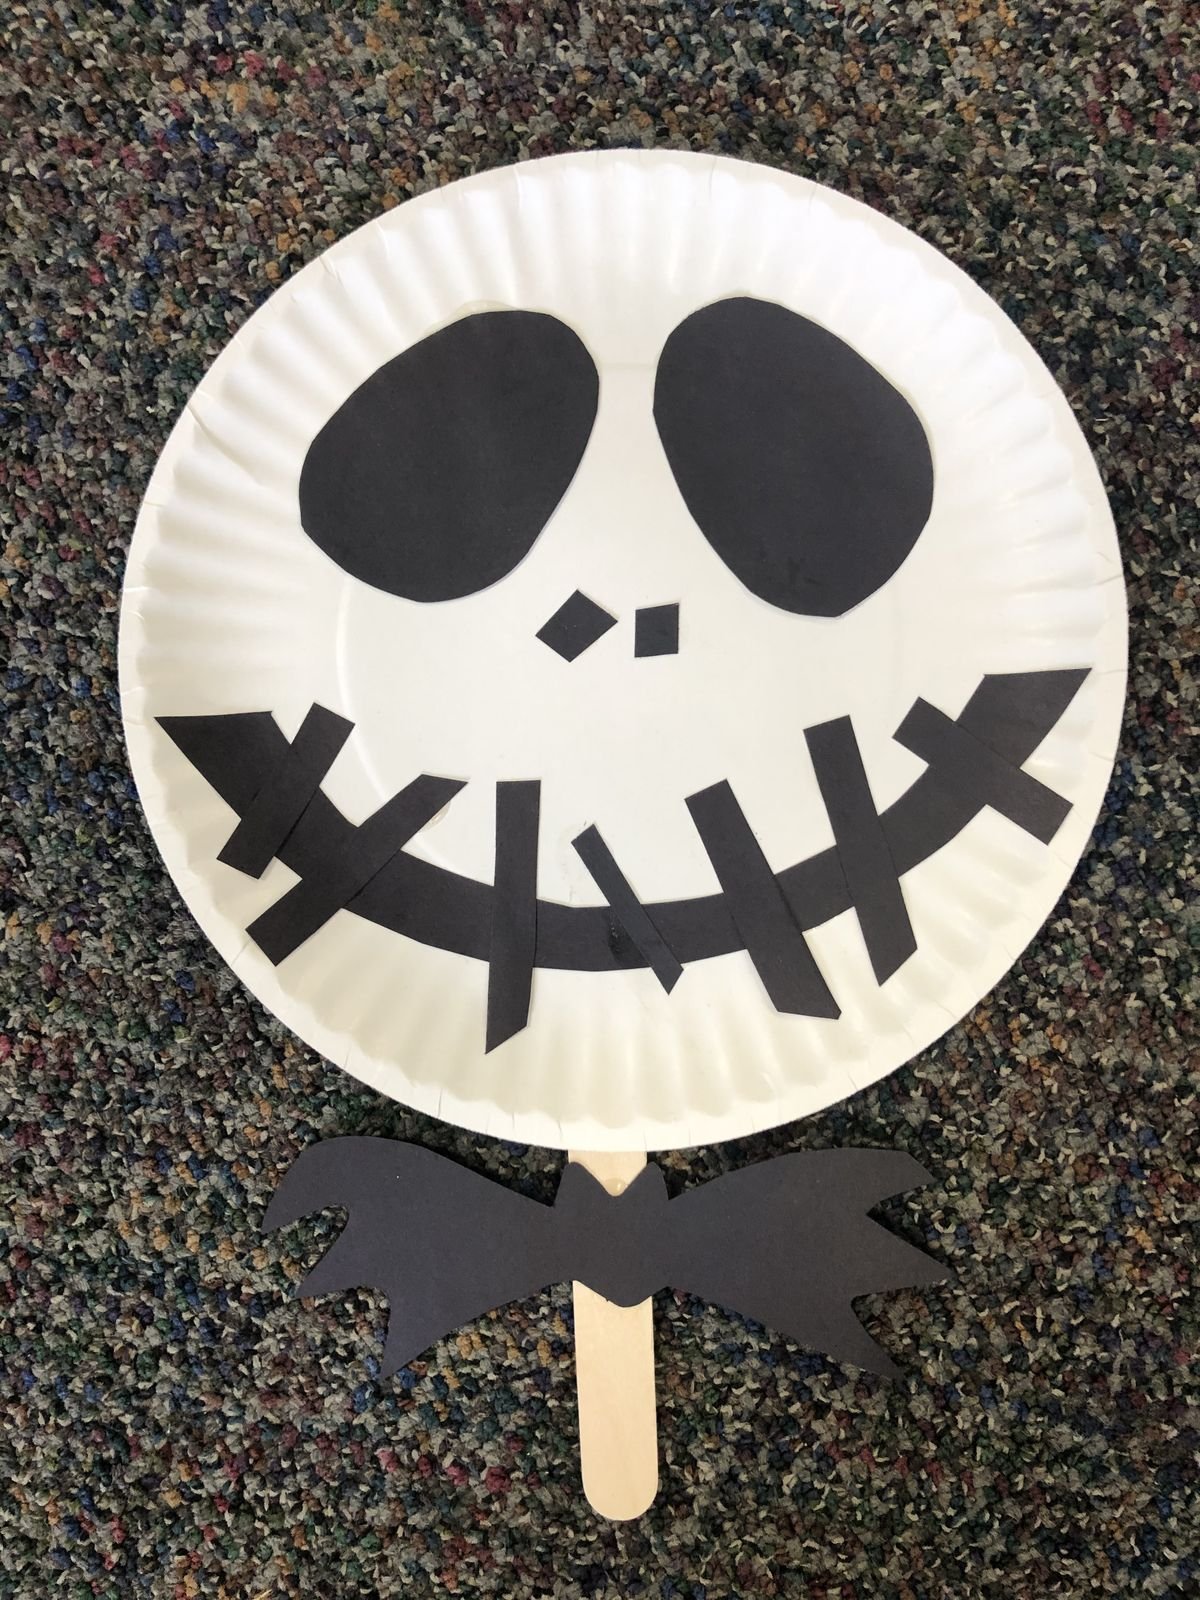
Jack Skellington Paper Plate Stick Puppet Craft
- Keep a paper plate white for the main skull face.
- Glue large black paper eye shapes, a tiny nose, and a wide stitched mouth.
- Attach a wooden craft stick and a black paper bat bowtie to the bottom edge.
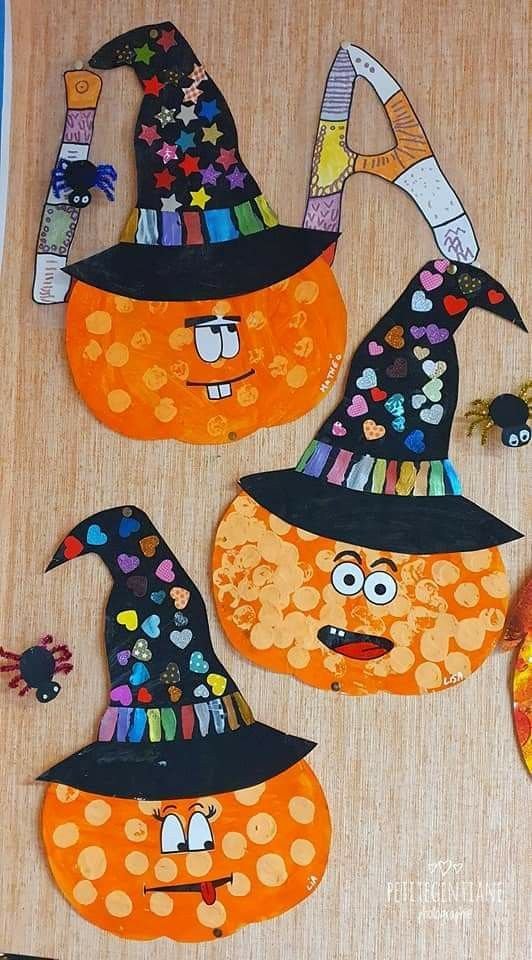
Magic Cauldron Paper Craft
- Paint a paper plate bright orange and sponge on textured round spots.
- Cut out a tall black witch hat decorated with colorful paper stickers.
- Glue the witch hat onto the top rim of the orange painted plate.
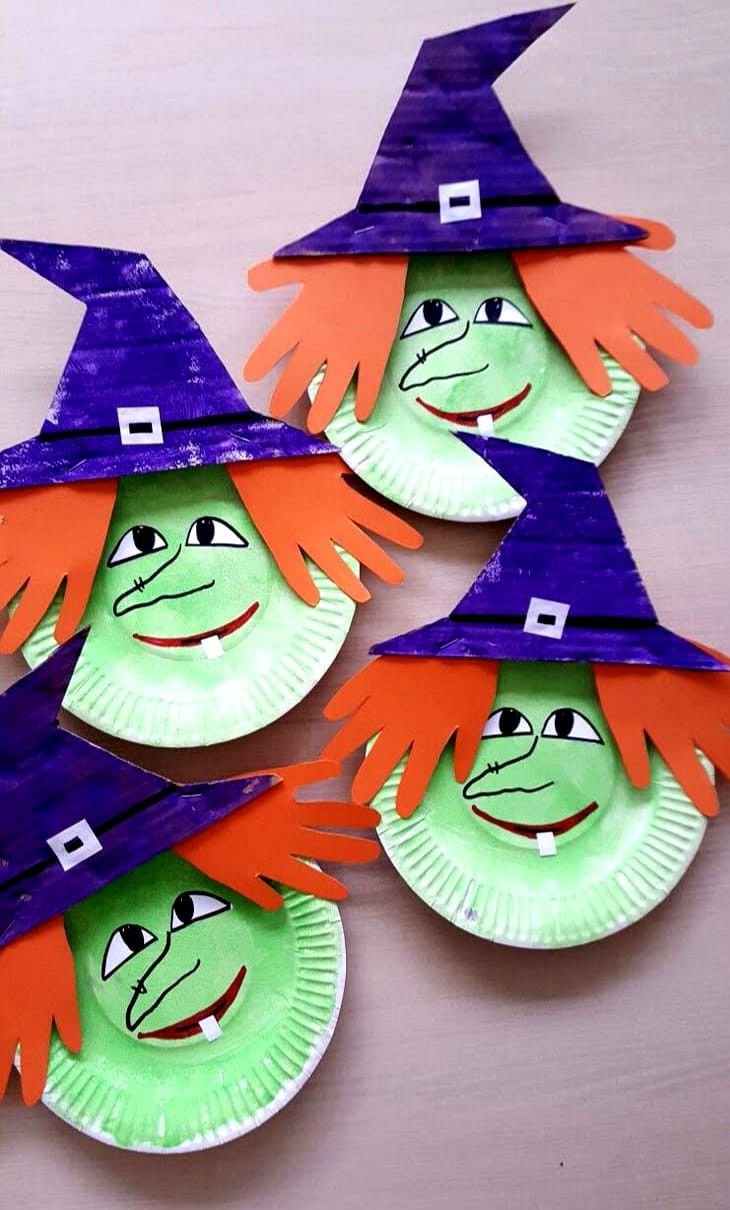
Witch Handprint Craft
- Paint a paper plate light green for the witch face and draw facial features.
- Cut two orange paper handprints to paste on both sides as hair.
- Glue a large purple paper witch hat on top of the plate rim.
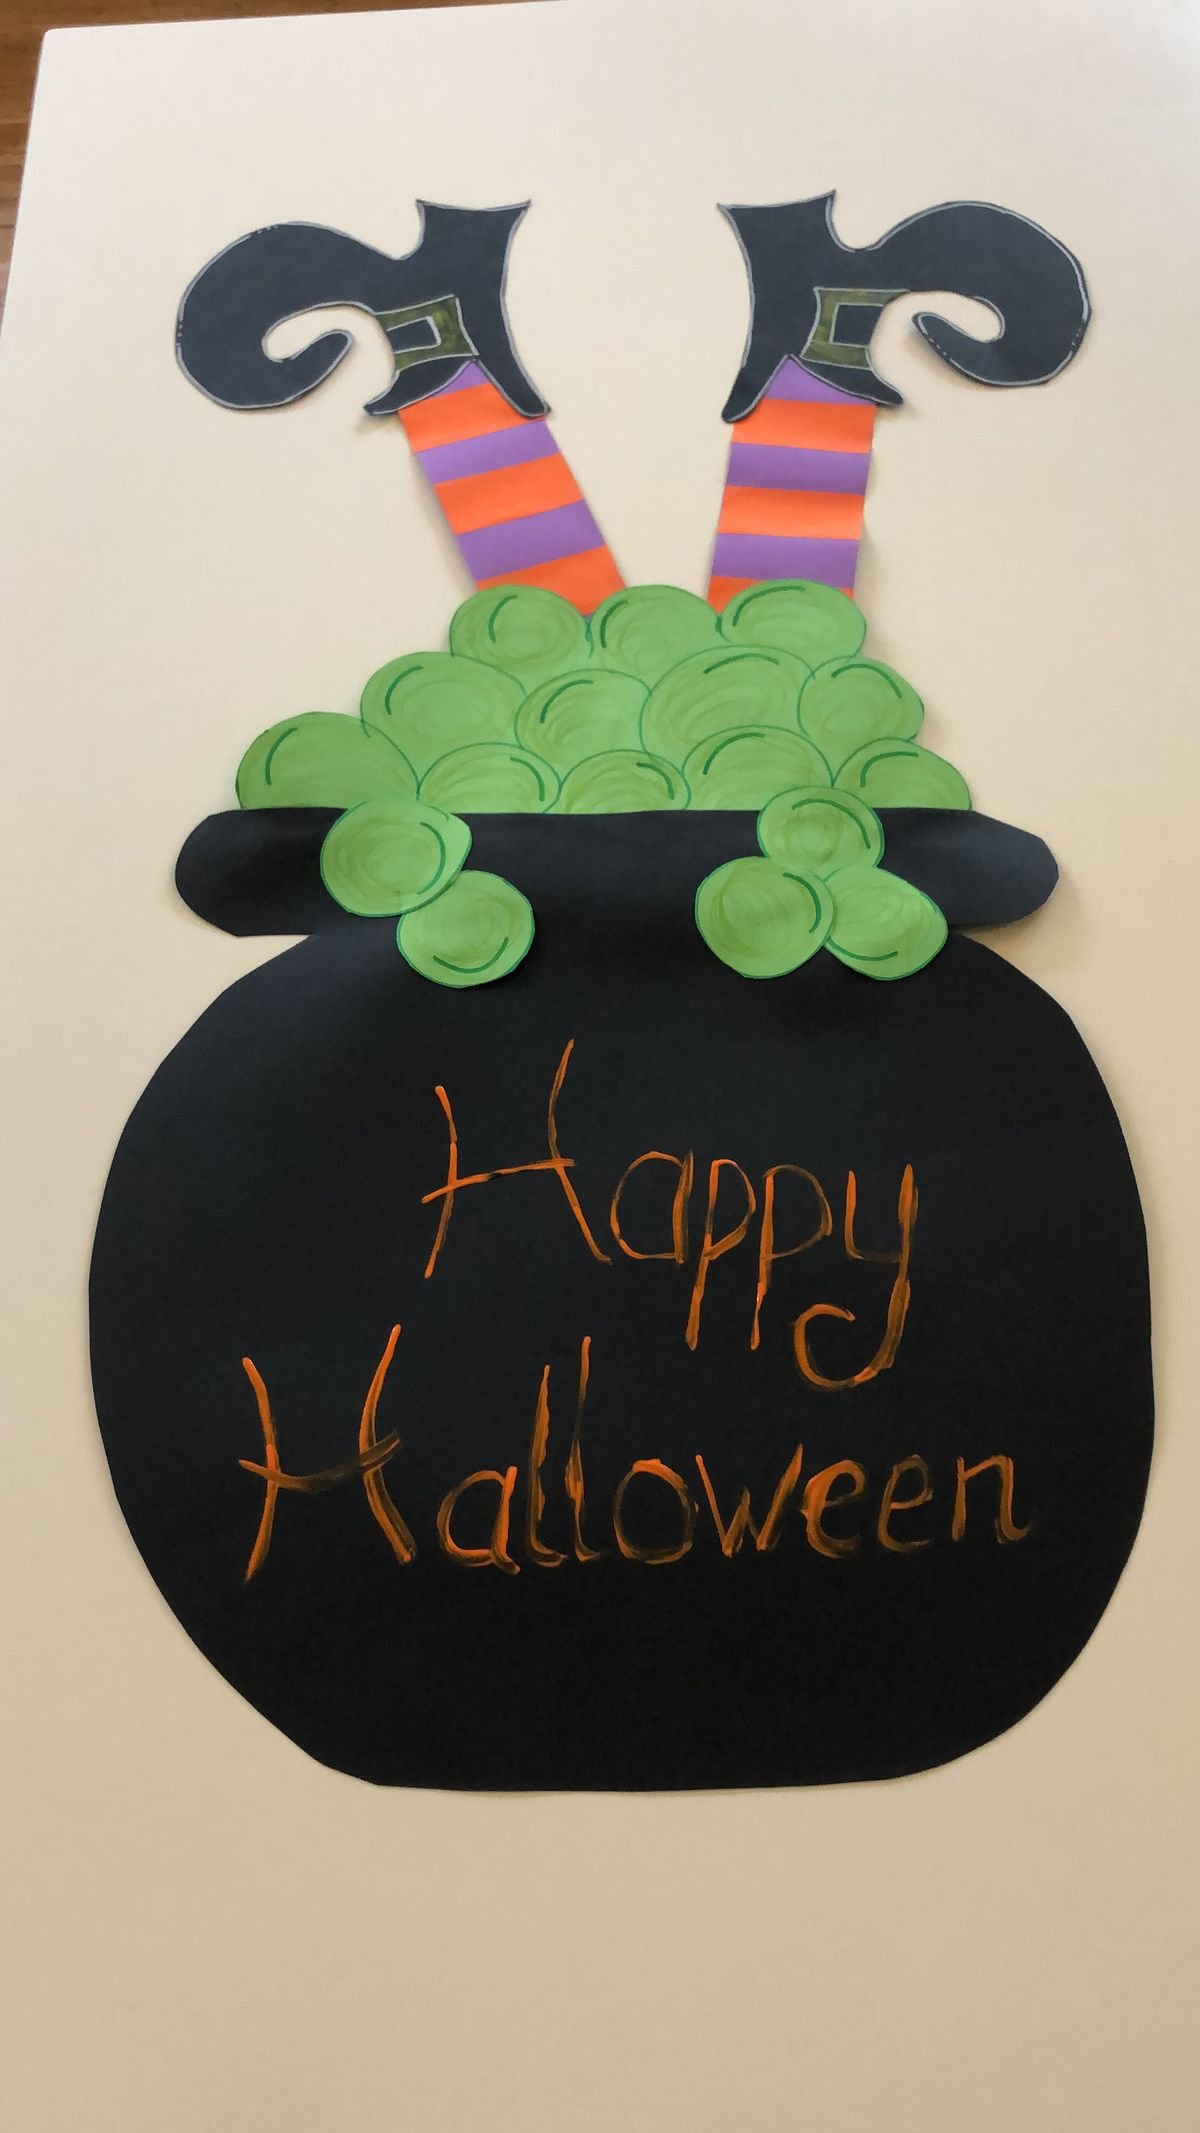
Witch Feet Door Hanger
- Cut a paper plate into a cauldron shape and paint it solid black.
- Glue green paper circles at the top rim to look like bubbling potion.
- Cut out striped paper witch legs with curly shoes and glue them behind the bubbles.
- Write a holiday greeting on the front using orange paint or marker.
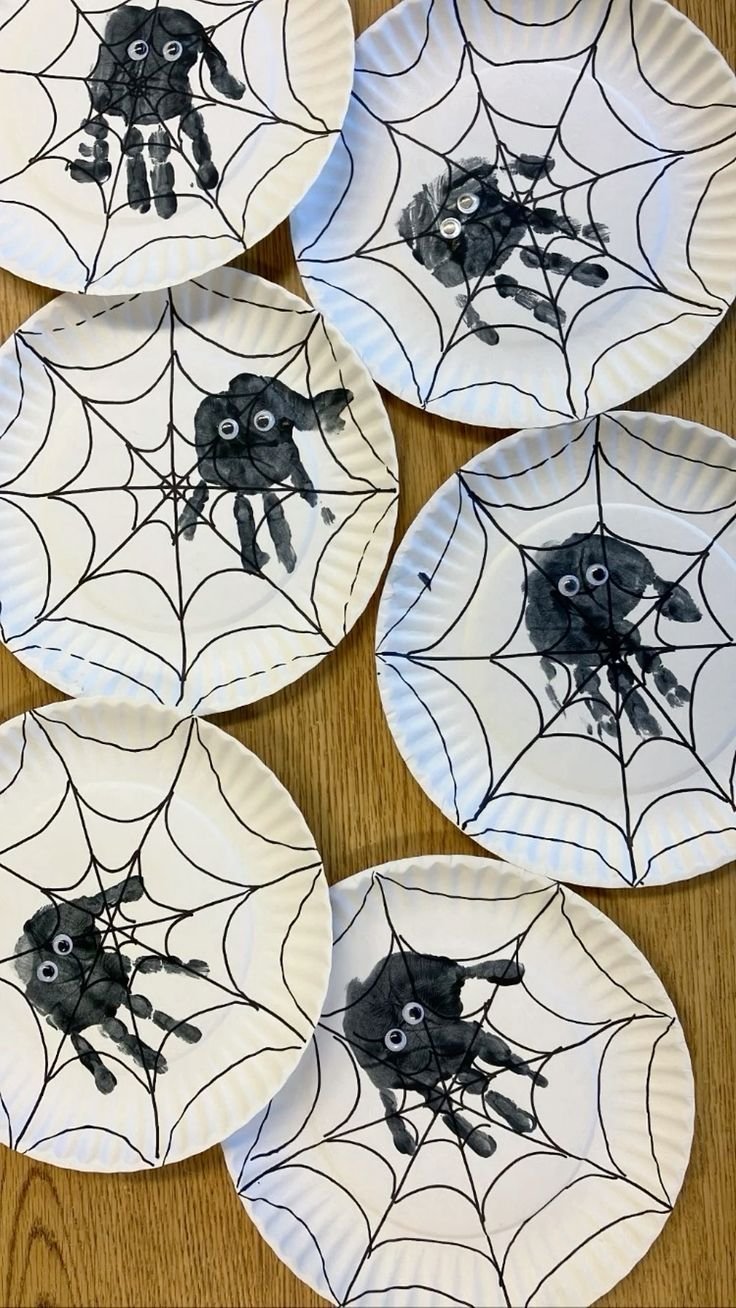
Halloween spider and web craft for toddlers
- Draw web lines across a white paper plate using a black marker.
- Press a black paint handprint in the center of the web for the body.
- Attach two small googly eyes onto the handprint palm once dry.
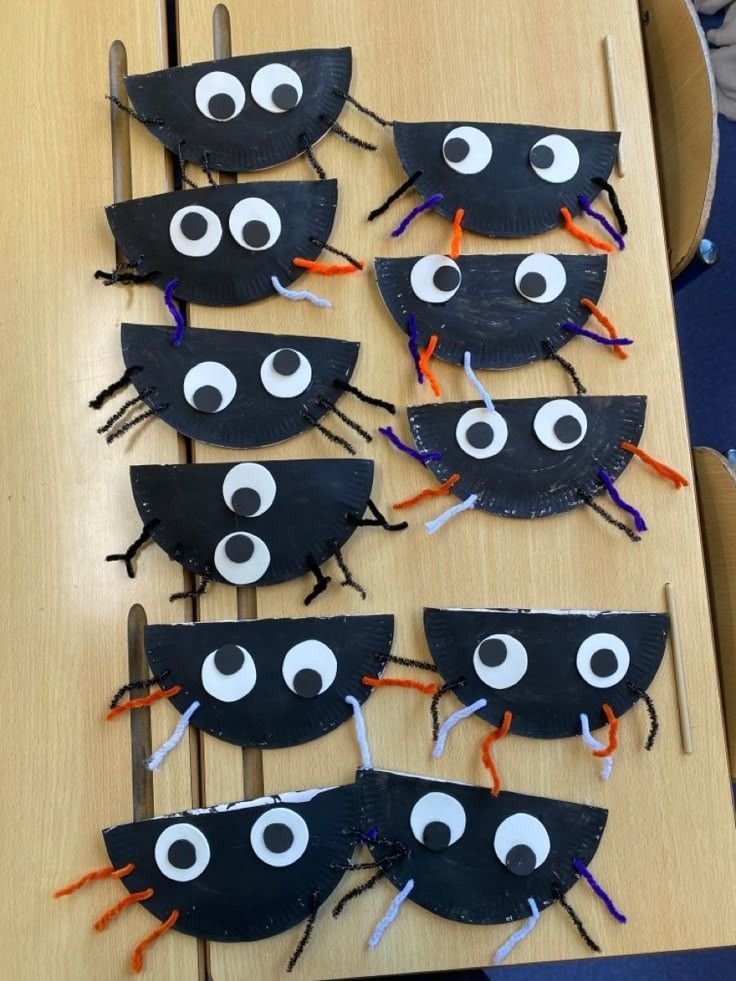
Paper Plate Spiders
- Fold or cut a paper plate in half and paint it solid black.
- Insert or glue pipe cleaner pieces along the sides for spider legs.
- Glue two large white paper eyes onto the black painted surface.
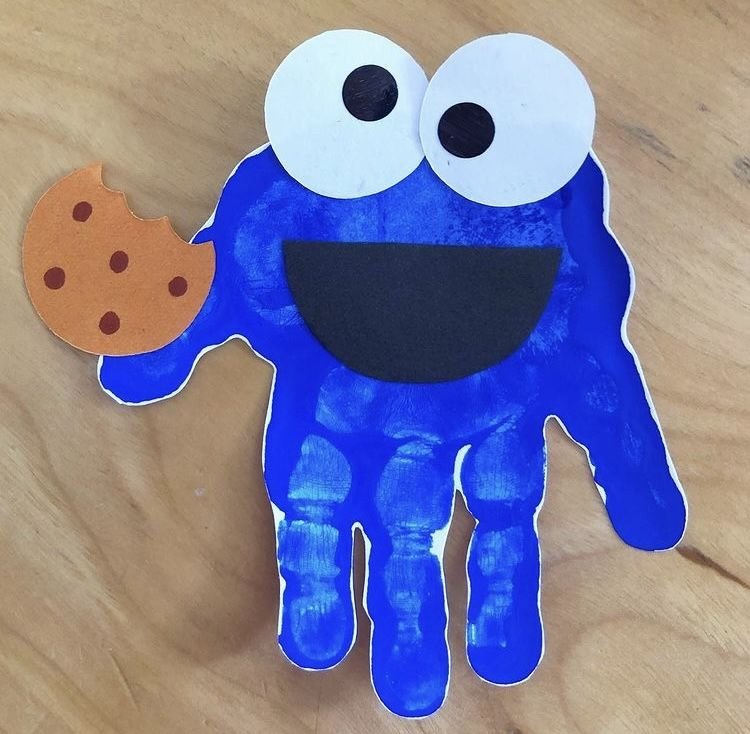
Cute Handprint Cookie Monster
Paint a paper plate blue and let it dry completely.
Cut two large white paper circles with black pupils for eyes and a large black paper mouth.
Glue the eyes, mouth, and a brown paper cookie shape onto the plate surface.
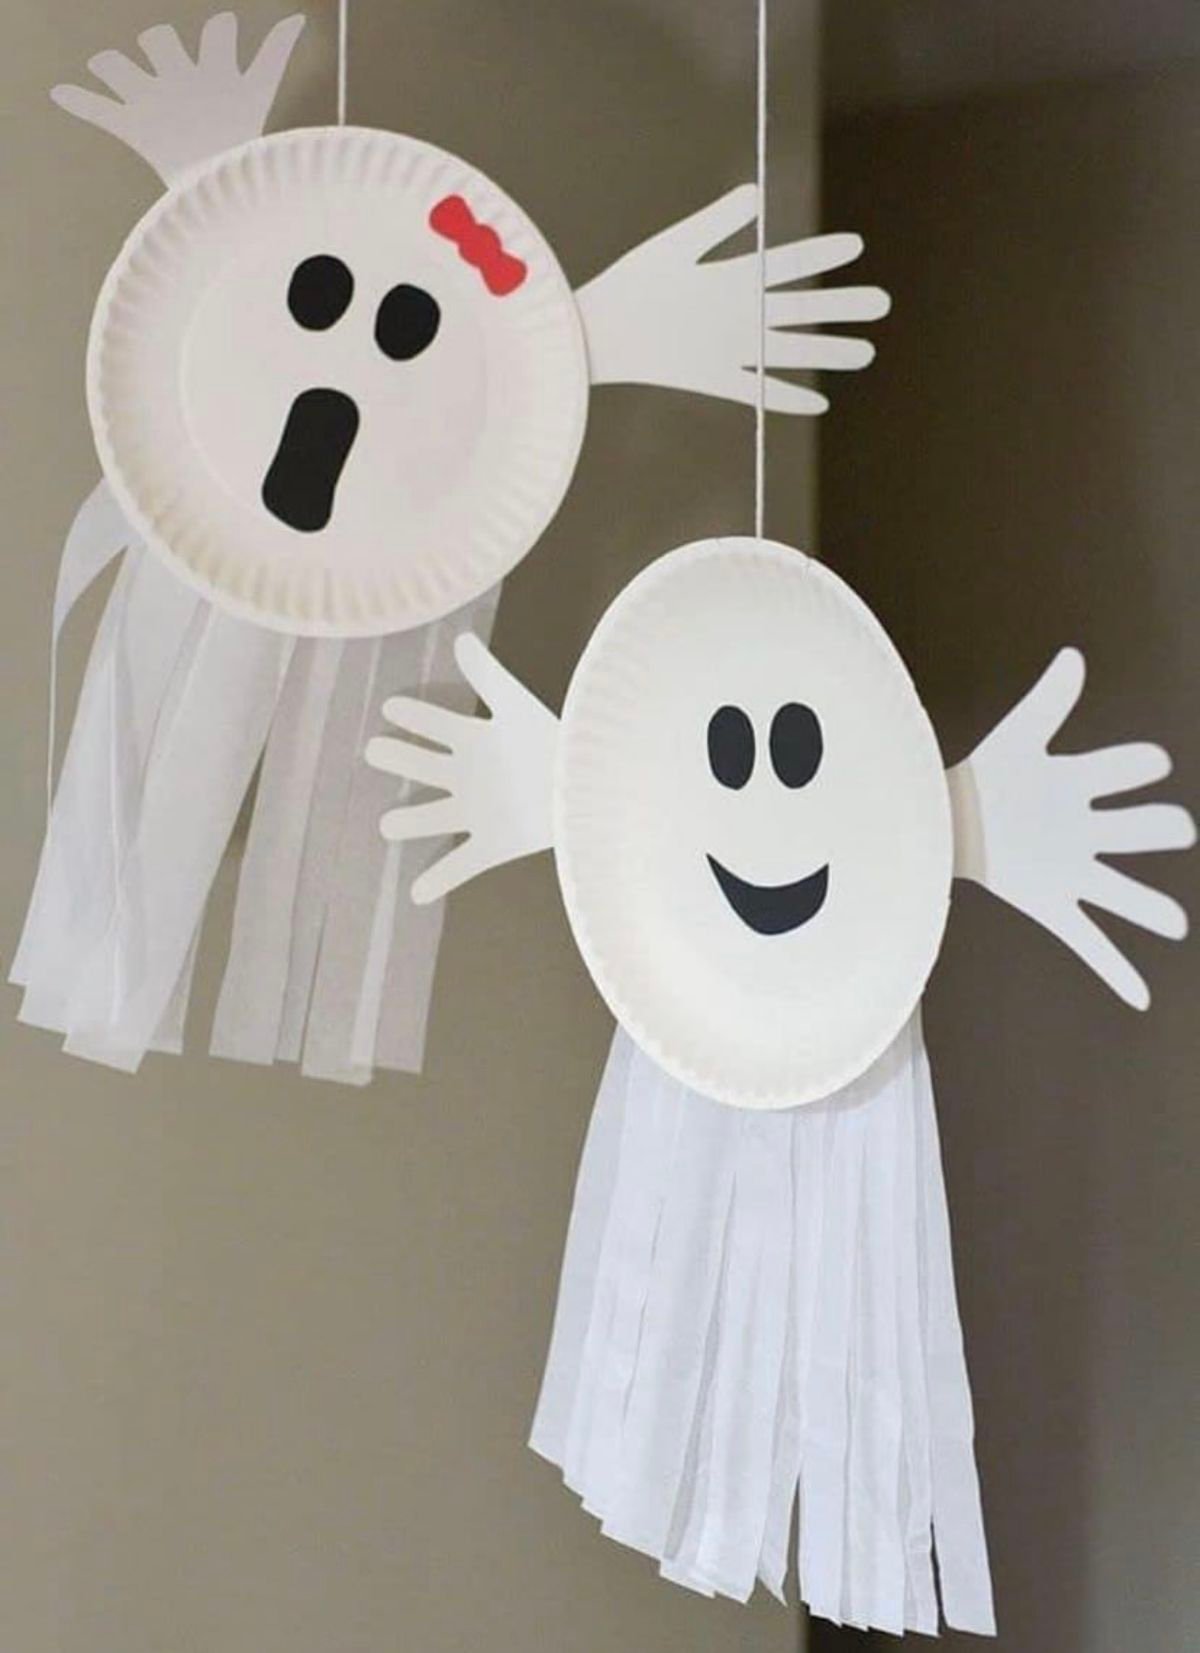
Paper Plate Hanging Ghost
- Glue two paper handprint cutouts behind a white paper plate for ghost arms.
- Cut eyes and a mouth out of black paper and glue them onto the front.
- Attach long white tissue paper streamers to the bottom edge.
- Tie a string to the top rim to hang the ghost.
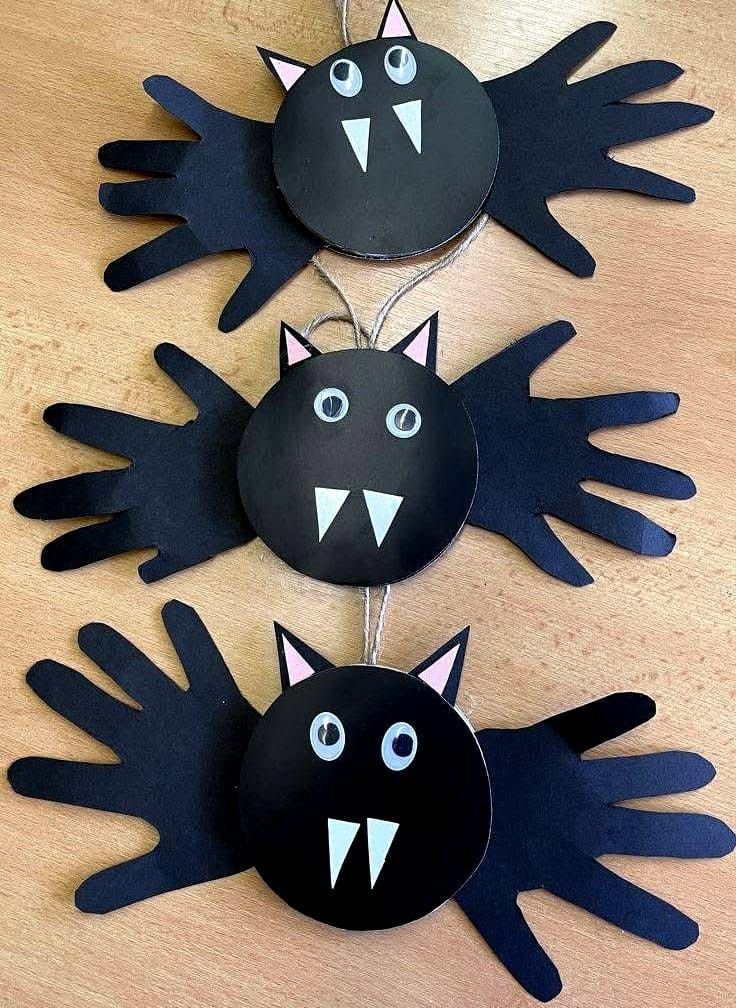
Paper Plate Black Bat
- Paint a small paper plate solid black or use a black paper circle.
- Trace and cut out two black handprints to attach as bat wings.
- Glue googly eyes and white paper triangle fangs onto the center face.
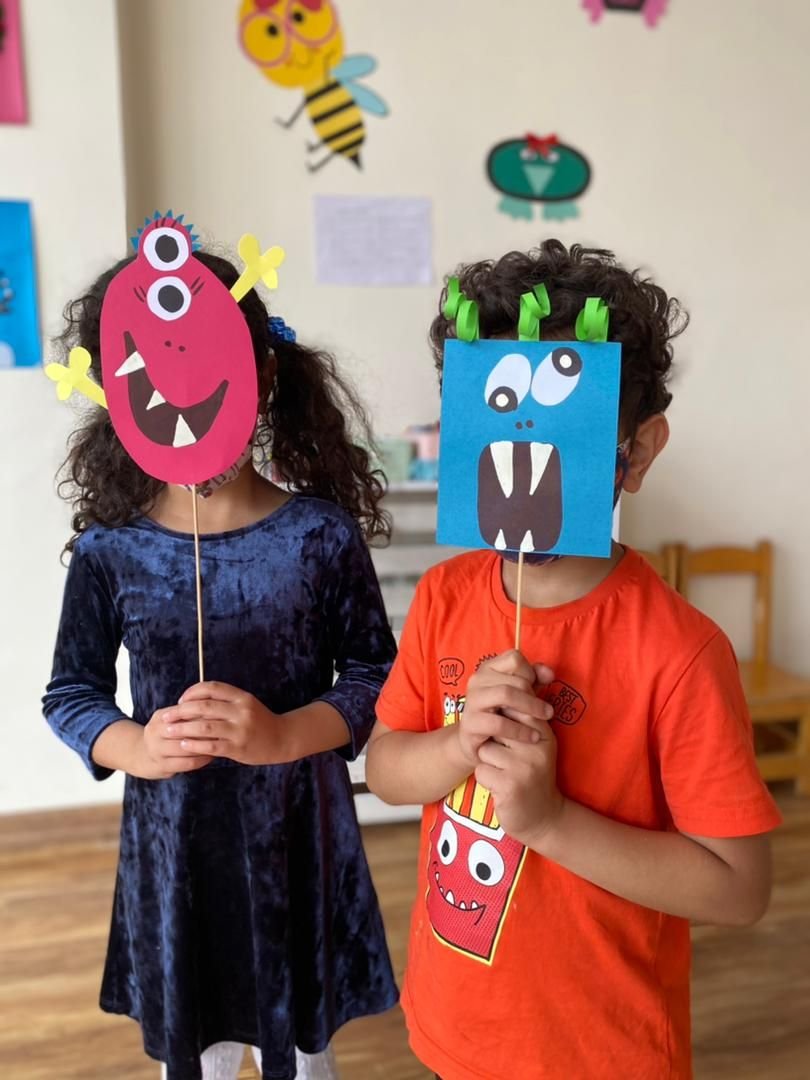
Paper Plate Monster mask
- Paint a paper plate a vibrant color like pink or blue.
- Cut out mouth shapes, paper teeth, horns, and large silly eyes.
- Glue a wooden craft stick to the bottom so it can be held as a mask.
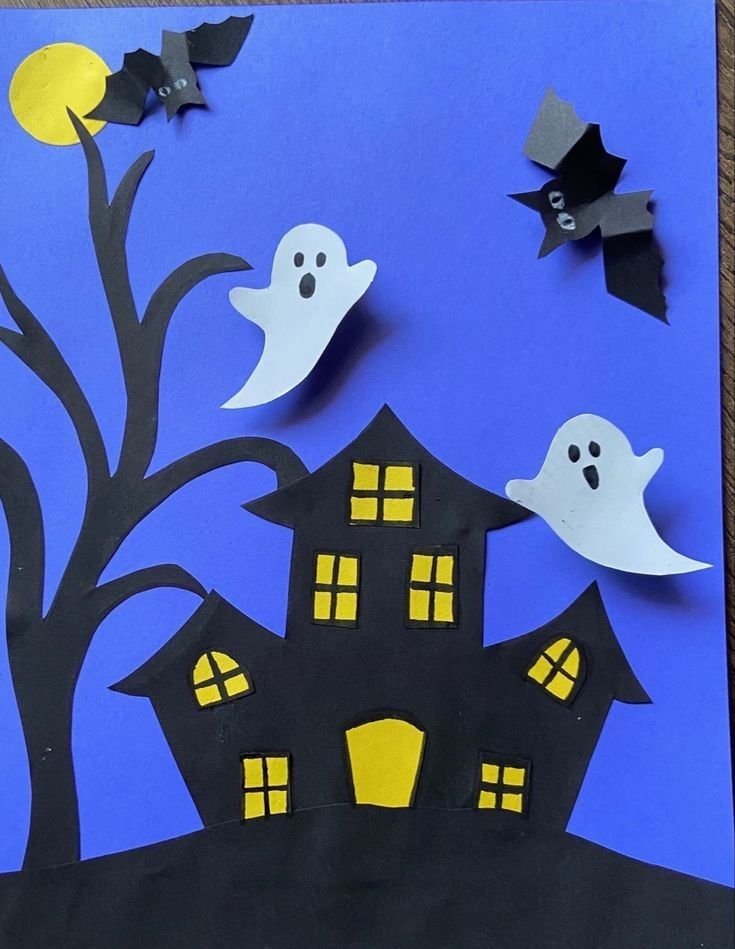
Halloween Haunted House craft
- Paint a paper plate blue or black to serve as the night sky background.
- Cut out a black paper haunted house, a full yellow moon, and spooky trees.
- Glue the black house, moon, and mini white paper ghosts onto the plate background.
Crafting during the holiday season is ultimately about creating lasting memories and enjoying quality time together. These simple paper plate projects demonstrate that you do not need complex tools or expensive kits to create festive decor that brightens up your home. Each completed craft, whether it is a handprint bat garland, a glowing pumpkin cauldron, or a goofy monster mask, carries a personal touch that manufactured decorations simply cannot replicate. Displaying these creations along your walls, on front doors, or hanging from ceilings brings an authentic, joyful Halloween spirit to any space.
As your children cut, paint, and assemble their spooky characters, they gain confidence in their artistic abilities while creating autumn keepsakes you can cherish for years to come. The beauty of these paper plate designs lies in their flexibility, so feel free to adapt the colors, materials, and expressions to suit your child's unique imagination. Gather your paints, craft paper, and paper plates, and start making these delightful DIY crafts today. Happy Halloween crafting to you and your family!
Ask Me Anything